

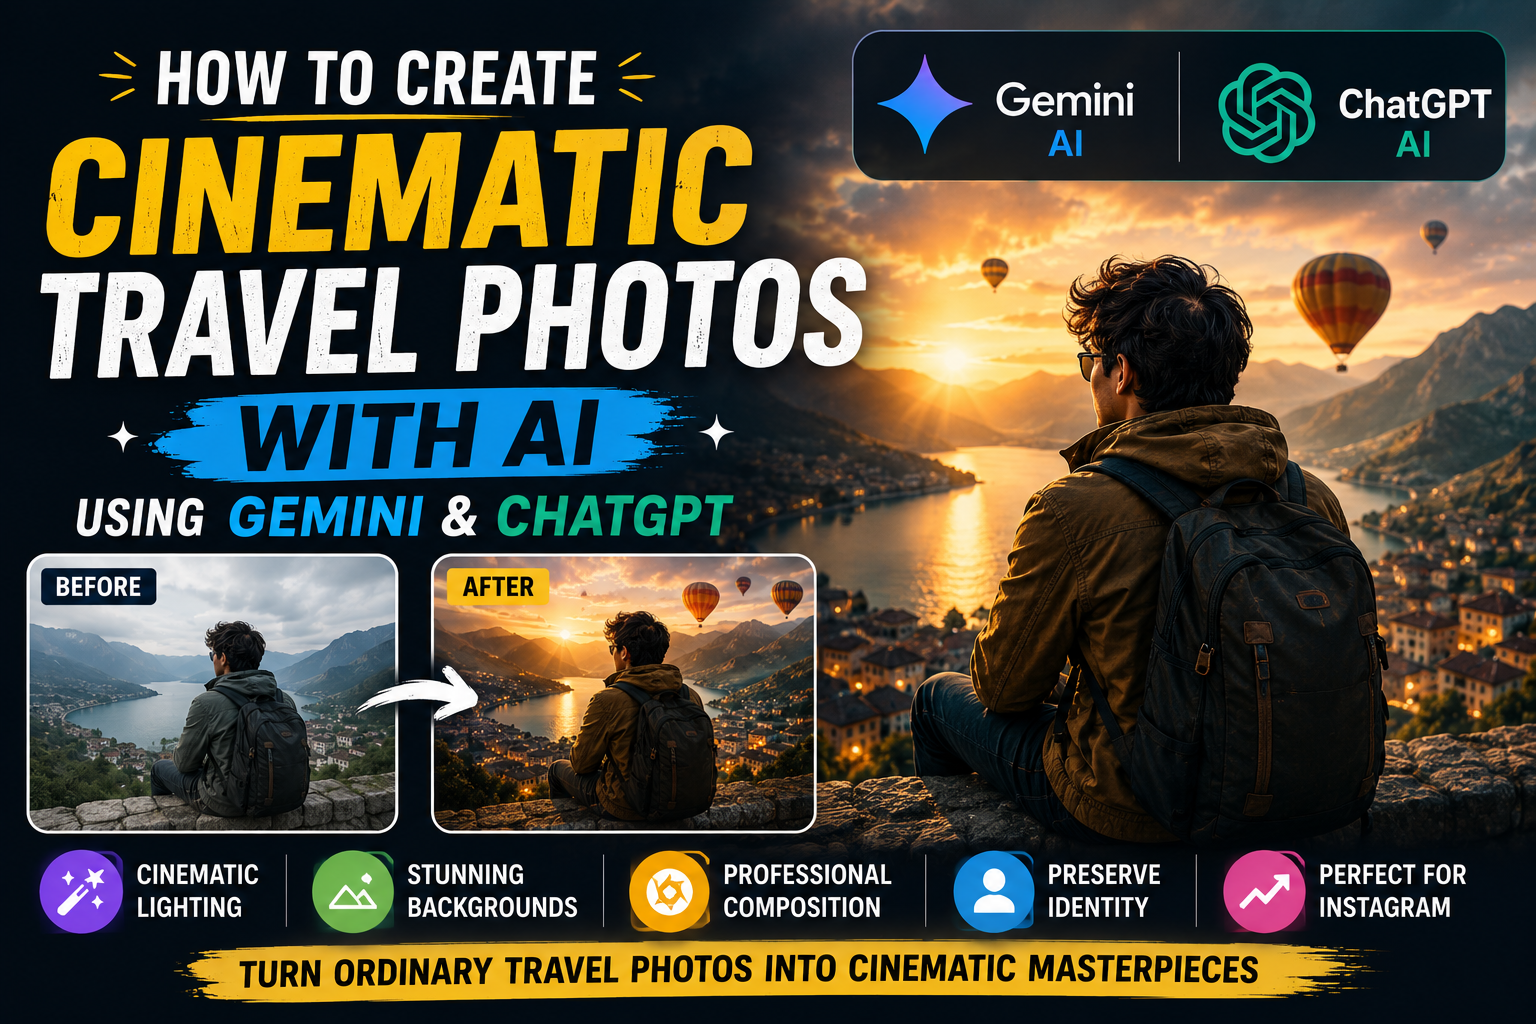
Travel photos are meant to capture memories, but sometimes an ordinary travel picture does not look as impressive as the actual moment felt. The lighting may be flat, the background may be distracting, or the composition may not have the cinematic look you imagined.
AI photo editing can help turn a normal travel photograph into a more polished and creative image while keeping the original person and important details recognizable.
With tools such as Gemini and ChatGPT, you can upload an existing image and describe the changes you want. Gemini supports editing uploaded images and can work with multiple image references, while ChatGPT Images can edit an uploaded image through natural-language instructions and also supports selected-area editing.
In this guide, you’ll learn how to create cinematic travel photos with AI, how to write effective prompts, how to improve lighting and backgrounds, how to preserve your face, and how to create Instagram-ready travel images.
What Are Cinematic Travel Photos?
A cinematic travel photo is more than simply adding a dramatic filter.
It usually combines:
- Strong composition
- Natural-looking lighting
- Atmospheric surroundings
- Balanced colors
- Depth and perspective
- A clear subject
- Realistic shadows
- A storytelling environment
For example, an ordinary street photograph can be transformed into a cinematic evening scene with warm lights, atmospheric depth and realistic reflections.
The goal should not be to make every image look heavily edited.
The goal is to make the photograph feel intentional, realistic and visually engaging.
Why Use AI for Travel Photo Editing?
Traditional photo editing can require multiple tools and considerable time.
AI allows you to describe your desired changes in everyday language.
For example, instead of manually replacing a background, adjusting lighting and creating shadows, you can write:
Transform my uploaded travel photo into a cinematic evening photograph. Preserve my face, hairstyle, clothing and body proportions. Improve the environment with realistic warm city lights, natural shadows, atmospheric depth and professional photography.
The AI can then interpret the instructions and create an edited version.
This makes AI useful for:
- Instagram travel posts
- Travel reels
- Vacation memories
- Profile photos
- YouTube thumbnails
- Travel blogs
- Social media campaigns
- Creative photography experiments
How to Create Cinematic Travel Photos With AI
Creating a cinematic travel image works best when you control the edit rather than asking AI to change everything randomly.
Step 1: Choose a Good Travel Photo
Start with the best original image you have.
Ideally, your photo should have:
- A clearly visible subject
- Reasonable image quality
- Natural facial visibility
- Good body positioning
- Enough background information
- No excessive blur
A good source image gives the AI more useful visual information.
If your original photo is already heavily edited, extremely blurry or badly exposed, the final result may be less consistent.
Step 2: Upload Your Photo
Gemini allows users to upload an image and ask for edits. Its current image tools also support multiple image references for certain workflows.
ChatGPT Images also lets you upload an existing image and describe the changes you want. You can either describe the edit directly or select a particular area before giving the editing instruction.
After uploading the photo, start with one major change instead of requesting a complete transformation immediately.
For example:
Improve the lighting and atmosphere of this travel photo while keeping the person unchanged.
Then refine the result.
Step 3: Tell AI to Preserve Your Identity
If the photo contains you, this is one of the most important parts of the prompt.
You don’t want the AI to create a completely different person.
Use instructions such as:
Preserve the person’s identity, facial structure, hairstyle, skin tone, natural facial features and body proportions. Do not change the person’s recognizable appearance.
You can also mention the clothing:
Keep the original clothing, accessories and overall appearance unchanged.
This gives the AI a clearer boundary between what should be edited and what should remain stable.
Step 4: Choose a Cinematic Environment
The environment determines the overall mood of the photograph.
You can create different cinematic travel styles such as:
- European street evening
- Mountain sunrise
- Tropical beach sunset
- Rainy city night
- Desert road
- Snowy mountain
- Old-town street
- Luxury resort
- Forest road
- Coastal highway
Instead of simply writing “cinematic background,” describe the actual environment.
Example
Place the subject on a beautiful old European street during blue hour, with warm window lights, subtle atmospheric haze, realistic pavement reflections and distant pedestrians softly out of focus.
Specific descriptions generally give the AI more visual direction.
Step 5: Add Cinematic Lighting
Lighting can completely change the mood of a travel photograph.
You can use:
- Golden-hour sunlight
- Blue-hour lighting
- Soft morning light
- Warm sunset light
- Moody overcast light
- Night street lighting
- Soft window light
- Dramatic side lighting
Golden-Hour Prompt
Add warm natural golden-hour sunlight coming from the side. Create realistic highlights on the subject and environment with soft natural shadows. Keep the lighting physically believable and avoid an artificial glow.
Blue-Hour Prompt
Create a realistic blue-hour atmosphere with cool ambient sky light and subtle warm lights from nearby buildings. Maintain natural skin tones and realistic shadows.
The key is balance.
Too much dramatic lighting can make a travel photograph look artificial.
Step 6: Add Depth to the Scene
Professional-looking travel photographs often have visual separation between foreground, subject and background.
You can ask for:
- Natural depth of field
- Slight background blur
- Atmospheric perspective
- Foreground elements
- Distant environmental details
Prompt
Create natural depth and separation between the subject and background. Keep the subject sharp while allowing distant background elements to become subtly softer. Maintain realistic perspective and avoid excessive artificial blur.
Step 7: Improve the Composition
AI can also help you create a better composition.
For example:
Recompose the travel photograph into a balanced vertical composition suitable for Instagram. Keep the person as the main subject and preserve the important environment around them. Leave a small amount of negative space near the upper portion of the frame.
This is particularly useful for social media.
Best Cinematic Travel Photo Prompts
Below are original prompts you can test in Gemini or ChatGPT.
Prompt 1: Cinematic City Travel Photo
Transform my uploaded travel photo into a realistic cinematic city photograph. Preserve my identity, face, hairstyle, skin tone, clothing and body proportions. Place me naturally in a stylish city street during blue hour with warm storefront lights, subtle atmospheric haze, realistic pavement reflections and soft background depth. Use professional travel photography composition, natural skin texture and believable lighting. Keep the final image photorealistic and avoid excessive filters or artificial effects.
Prompt 2: Mountain Travel Photo
Edit my uploaded photo into a cinematic mountain travel photograph. Keep my face, identity, hairstyle, clothing and body proportions unchanged. Place me naturally in a dramatic mountain landscape during early morning with soft sunlight, distant mountain layers, realistic atmospheric perspective and subtle mist. Use natural colors, realistic shadows and professional outdoor photography composition. Make the environment impressive without making it look artificial.
Prompt 3: Beach Sunset Travel Photo
Turn my uploaded travel photo into a realistic cinematic beach photograph during sunset. Preserve my exact identity and natural appearance. Keep my clothing and body proportions unchanged. Add a realistic ocean background with warm sunset light, soft clouds, gentle reflections on the water and natural shadows. Use subtle cinematic color grading while keeping skin tones realistic. Create a professional travel photography look without excessive saturation.
Prompt 4: Rainy City Travel Photo
Transform my uploaded travel image into a realistic rainy-night city scene. Preserve my face, identity, hairstyle, clothing and body proportions. Add gentle rainfall, wet pavement with natural reflections, warm street lights and realistic atmospheric depth. Keep the rain believable and subtle. Use cinematic night photography with natural skin tones, realistic shadows and detailed environmental lighting. Do not make the image look like a fantasy scene.
Prompt 5: Luxury Resort Travel Photo
Edit my uploaded photo into a premium cinematic travel photograph at a luxury tropical resort. Keep my identity, face, hairstyle, clothing and body proportions unchanged. Create a realistic resort environment with tropical plants, elegant architecture, warm natural sunlight and subtle background depth. Use professional lifestyle photography composition, realistic shadows and natural colors. Keep the final image believable and photorealistic.
Prompt 6: Road Trip Travel Photo
Transform my uploaded photo into a cinematic road-trip photograph. Preserve my identity and original appearance. Place me naturally beside a scenic highway surrounded by mountains and open landscape during golden hour. Add realistic sunlight, atmospheric depth, subtle lens characteristics and natural shadows. Keep the environment photorealistic and maintain accurate proportions and perspective.
How to Make Travel Photos Look Realistic
One of the biggest mistakes in AI photo editing is asking for too many dramatic effects.
A realistic cinematic photograph should still look like something that could have been captured with a real camera.
Add instructions such as:
Keep the image photorealistic with natural skin texture, realistic lighting, accurate perspective, physically believable shadows, subtle depth of field and natural environmental details. Avoid excessive HDR, artificial glow, plastic skin, unrealistic colors and overprocessed effects.
This is more useful than simply writing:
Make it ultra realistic 8K.
High resolution alone does not make an image realistic.
How to Create Instagram-Ready Travel Photos
Instagram images need strong composition because the photograph may be viewed quickly while scrolling.
For a vertical travel post, try:
Create a vertical 4:5 Instagram composition. Keep the person clearly visible and position the subject using balanced photographic composition. Preserve enough surrounding environment to communicate the travel location. Use natural cinematic lighting and leave subtle negative space where appropriate.
For a Reel cover, you can request a different composition:
Create a vertical 9:16 composition suitable for an Instagram Reel cover. Keep the main subject away from the extreme edges and leave clean space near the upper portion for optional text. Preserve the travel environment and use realistic cinematic lighting.
Always check the final crop before publishing.
Gemini vs ChatGPT for Cinematic Travel Photos
Both tools can be useful for cinematic travel editing.
Gemini
Gemini’s current image tools support uploaded-image editing, local edits and multiple-image workflows. Google also highlights improved instruction following and character consistency in its current image-generation tools.
This can be useful when you want to:
- Experiment with different travel environments
- Use multiple reference images
- Maintain visual consistency
- Make specific image changes
- Create different versions of a travel concept
ChatGPT
ChatGPT Images supports creating images and editing existing uploads through natural-language instructions. It also provides a selection tool for targeted changes and allows users to specify different aspect ratios.
This can be useful when you want to:
- Refine an image conversationally
- Make targeted edits
- Change a specific area
- Adjust the composition
- Experiment with different aspect ratios
- Improve a prompt through multiple iterations
There is no universal winner.
The best tool can depend on the original image, the prompt and the specific travel style you are trying to create.
How to Get Better Results From AI Travel Prompts
A strong prompt should answer several questions.
What is the subject?
Describe who or what should remain the focus.
Where is the subject?
Describe the travel location and environment.
What is the lighting?
Specify sunset, morning, blue hour, overcast or another realistic lighting condition.
What should remain unchanged?
Mention identity, clothing, face, hairstyle and other important details.
What should change?
Clearly identify the background, lighting, atmosphere or composition you want to modify.
What visual style do you want?
Use terms such as realistic travel photography, editorial photography or cinematic outdoor photography.
What should be avoided?
Mention things such as excessive blur, artificial skin, unrealistic lighting or distorted proportions.
A Simple Prompt Formula for Cinematic Travel Photos
You can create your own prompts using this formula:
Reference Image + Subject Preservation + Location + Lighting + Atmosphere + Composition + Photography Style + Realism
For example:
Use my uploaded image as the reference. Preserve my identity, face, hairstyle, clothing and natural appearance. Place me in [location] during [time of day]. Add [lighting and atmosphere]. Use [composition] with natural depth of field and realistic perspective. Create a professional cinematic travel photography look with realistic skin texture and believable environmental details. Avoid excessive filters, artificial glow and distorted features.
This formula can be adapted to almost any destination.
Common AI Travel Photo Editing Mistakes
1. Changing Everything at Once
Don’t ask AI to change the face, clothes, background, weather, pose, lighting and camera angle simultaneously unless you are intentionally creating a completely new image.
Start with the most important edit.
2. Using Vague Prompts
“Make my travel photo amazing” gives the AI very little useful direction.
Describe the environment, lighting, composition and mood.
3. Overusing Cinematic Effects
Cinematic does not mean extremely dark, oversaturated or covered in artificial lens flares.
Keep effects subtle.
4. Forgetting Identity Instructions
If the person needs to remain recognizable, explicitly tell the AI what should remain unchanged.
5. Ignoring Perspective
If you place a person into a completely new environment, the lighting, scale and perspective should make sense together.
Ask for:
realistic perspective, matching environmental lighting and natural shadows.
6. Using an Unclear Source Image
A clear original photograph generally provides better visual information than a very blurry or heavily compressed image.
How to Create Multiple Travel Photos From One Image
You don’t need a separate photo shoot for every visual concept.
Start with one suitable travel portrait and create variations such as:
Version 1
Mountain sunrise.
Version 2
European city evening.
Version 3
Tropical sunset.
Version 4
Rainy urban night.
Version 5
Luxury resort.
Version 6
Scenic road trip.
Keep the identity and clothing consistent while changing the environment and lighting.
This can help you build a visually consistent Instagram feed.
Important Tips Before Publishing AI Travel Photos
AI-edited travel images are creative content, but they should not be used to deliberately mislead people.
If a photograph represents an actual trip or event, consider whether the AI changes could create a false impression of what really happened.
Also be careful when using other people’s photographs, recognizable locations, logos or copyrighted material. Google specifically advises users to consider copyright and privacy rights when relying on or publishing content generated with Gemini.
For personal creative edits, experiment freely. For commercial content, review the final image carefully before publishing.
Final Thoughts
Learning how to create cinematic travel photos with AI is less about finding one magical prompt and more about understanding how to describe a photograph.
Start with a good reference image. Tell the AI what must remain unchanged, then describe the location, lighting, atmosphere and composition you want.
Gemini and ChatGPT can both be useful for this workflow. Gemini supports uploaded-image editing and multiple-image reference workflows, while ChatGPT allows uploaded-image editing, conversational refinements and selected-area changes.
For the most realistic results, don’t overload your prompt with unnecessary effects.
Focus on:
realistic lighting + natural composition + accurate identity + believable environment + subtle cinematic styling.
That combination will usually produce a much more convincing travel photograph than simply asking for a “viral cinematic photo.”
Frequently Asked Questions
Can I create cinematic travel photos with Gemini?
Yes. Gemini’s current image tools allow users to upload images and request edits, including changes to environments and visual styles.
Can ChatGPT edit my existing travel photo?
Yes. ChatGPT Images allows you to upload an existing image and describe the changes you want. You can also use the selection tool for specific areas.
How do I keep my face unchanged in an AI travel photo?
Clearly instruct the AI to preserve your identity, facial structure, hairstyle, skin tone, clothing and body proportions. Using a clear reference image can also help.
What makes a travel photo look cinematic?
A combination of strong composition, realistic lighting, atmospheric depth, natural colors and storytelling environment creates a cinematic appearance.
What aspect ratio is best for Instagram travel photos?
A vertical 4:5 composition works well for standard Instagram feed posts, while 9:16 is suitable for vertical Stories and Reels.
Can I use one photo to create multiple travel locations?
Yes. You can use the same reference image and create different versions by changing the environment, lighting and atmosphere while instructing the AI to preserve the subject.
Why do my AI travel photos look fake?
Common causes include excessive effects, unrealistic lighting, incorrect perspective, unnatural skin texture and vague prompts. Add specific instructions for realistic shadows, natural lighting, accurate proportions and subtle depth.
Should I use Gemini or ChatGPT for travel photo editing?
Both can work well. Try the same reference image and prompt in both tools and compare the results based on identity preservation, realism, lighting and composition.






