

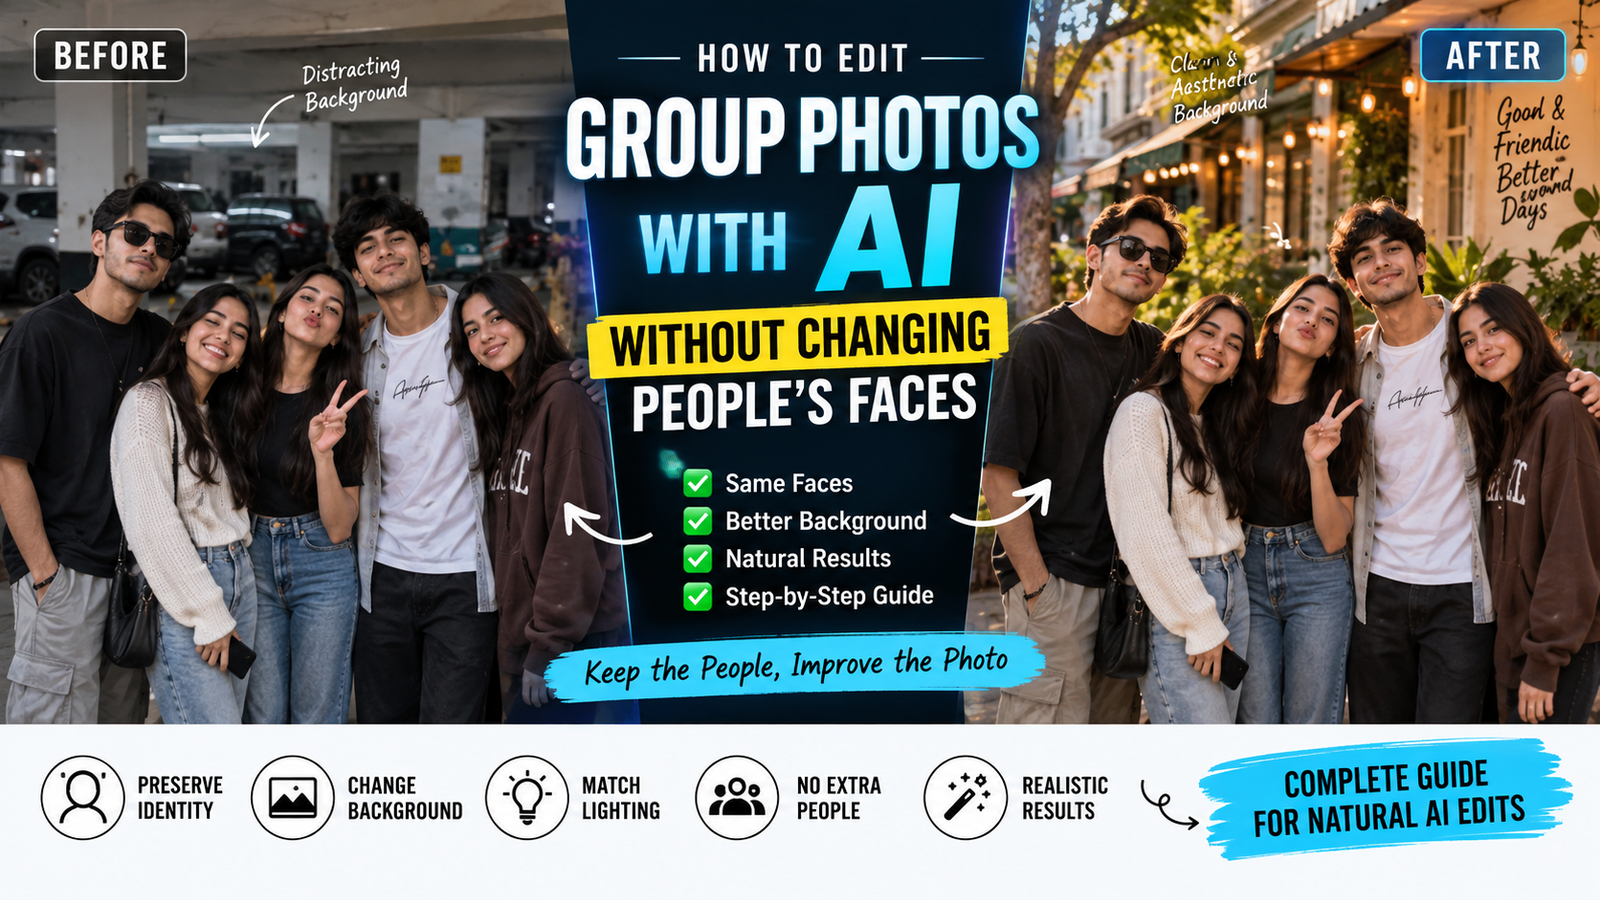
Editing a group photograph with AI is very different from editing a single portrait. When several people appear in the same frame, even a simple background or lighting adjustment can unintentionally alter faces, hairstyles, clothing, poses, or body proportions.
The challenge is therefore not just making a group photo look better. It is making a specific improvement while keeping the people in the photograph recognizable and preserving the details that make the original image authentic.
A good AI editing process starts before you even write the prompt. You need to decide what the photograph actually needs, which areas can safely be changed, and which details should be treated as fixed.
Start With the Photograph, Not the Prompt
Before opening an AI editor, look at the original image carefully.
Ask yourself:
What is wrong with this photograph?
Maybe the background is distracting. Perhaps there is an unwanted object, poor lighting, an empty area, or an environment that doesn’t suit the photograph.
Now ask a second question:
What is already working well?
Perhaps everyone’s faces look natural, the poses are good, and the clothing is exactly how you want it.
Those parts don’t need to be regenerated.
This simple distinction can prevent unnecessary changes.
For example, if the only problem is a messy background, there is little reason to ask an AI system to redesign the people in the photograph.
Think of AI Editing as a Masked Operation
A useful mental model is to divide the photograph into two areas:
Area A — Change
The part you actually want to modify.
Area B — Protect
Everything that already looks correct.
For a group photograph, Area B may include:
- Faces
- Expressions
- Hairstyles
- Clothing
- Body proportions
- Poses
- Hands
- Accessories
- Number of people
This way of thinking is often more useful than trying to create an extremely long prompt.
The question becomes:
“Where should AI work?”
rather than:
“What can AI change?”
Why Faces Change During Apparently Simple Edits
AI image editors don’t always treat an existing photograph like a traditional Photoshop layer.
Depending on the tool and editing method, the model may reconstruct portions of the image while attempting to satisfy your instruction.
That can cause subtle changes.
A person might still look similar at first glance, but closer inspection may reveal:
- Different eye shape
- Changed nose proportions
- A different smile
- Altered jawline
- New hairstyle details
- Smoother skin
- Different facial expression
These changes can be especially noticeable when the original photograph contains several people.
The solution isn’t necessarily to write a longer and longer prompt. It is to reduce the amount of unnecessary regeneration.
The One-Change Rule
When identity matters, begin with one meaningful modification.
For example, don’t start with:
Change the background, improve everyone’s faces, make the clothes more fashionable, add cinematic lighting, change the weather and make everyone look more attractive.
That’s a large transformation.
Instead, start with:
Replace the background while preserving the people and their original appearance.
Once that version looks correct, you can decide whether another adjustment is actually necessary.
This creates a much more controlled editing process.
Separate Creative Changes From Correction Work
Not every AI edit has the same purpose.
There are two broad situations.
Creative transformation
You intentionally want the photograph to look substantially different.
Examples include moving a group into another environment or creating a completely different visual style.
Corrective editing
You want to fix something without changing the character of the photograph.
Examples include:
- Removing a distracting object
- Cleaning the background
- Fixing a small visual defect
- Adjusting exposure
- Making colors more balanced
If your goal is realism, corrective editing is usually easier to control.
Background Replacement Without Touching the People
Background replacement is a common use case for group photographs.
Suppose your original photo was taken in a crowded parking area and you want a cleaner outdoor setting.
The important thing is to describe the environment without giving the AI unnecessary permission to redesign the subjects.
A useful editing instruction might be:
Replace the existing background with a realistic outdoor café environment while preserving all people exactly as shown in the source photograph. Keep their original facial identity, expressions, hairstyles, clothing, body proportions and poses. Preserve the original number of people and their relative positions. Match the perspective, lighting direction, color temperature and ground shadows to the new environment. Do not alter the people or regenerate unrelated areas of the photograph.
The location can be changed to whatever suits your photograph.
The important idea is the separation between environmental change and subject preservation.
Don’t Forget the Ground
A background isn’t only what appears behind the people.
It also includes the surface they are standing on.
If someone is standing on pavement in the original photograph and the AI replaces it with another surface, the feet and shadows need to make sense in the new environment.
Look for:
- Foot placement
- Contact shadows
- Ground perspective
- Surface texture
- Light direction
- Distance between people and background objects
If these elements don’t agree, the photograph can look composited even when the faces are perfect.
Lighting Is the Connection Between People and Background
A replacement background can be technically convincing but still look fake because the lighting doesn’t match.
Imagine the people were photographed in bright afternoon sunlight.
Now imagine the AI places them in a dark, cloudy environment.
Even if the background itself looks realistic, the people may appear pasted into it.
When changing an environment, consider:
Direction: Where is the light coming from?
Intensity: Is the scene bright or subdued?
Color: Is the light warm, neutral or cool?
Shadow: Where should shadows fall?
Contrast: Are the subjects strongly lit or softly illuminated?
A useful instruction is:
Match the new environment’s illumination with the existing subjects so that the light direction, softness, color temperature and shadows appear physically consistent.
Preserve the Original Camera Perspective
Perspective is another reason an edited group photograph can look artificial.
Suppose the original camera was approximately at eye level.
If the new background appears to have been photographed from a dramatically higher or lower position, the relationship between the people and environment may look wrong.
Check the:
- Horizon
- Vertical lines
- Floor lines
- Buildings
- Road edges
- Relative size of nearby objects
Background objects should appear to exist at a believable distance from the people.
Don’t Use “Make Everyone Perfect”
Words such as “perfect,” “flawless,” and “model-like” can produce unwanted changes.
If the purpose of the edit is to preserve the original people, these instructions work against your goal.
For realistic photographs, it is usually better to request natural details.
For example:
Preserve realistic skin texture and natural facial characteristics. Avoid excessive retouching, artificial skin smoothing or beauty-filter effects.
The objective is not to remove every imperfection.
The objective is to make the edit believable.
When One Face Has Already Changed
Sometimes an AI edit looks good overall but one person’s face is slightly different.
Don’t immediately throw away the entire result.
If your editing tool supports selecting a specific area, correct that area separately.
For example:
Restore the affected person’s facial appearance using the original photograph as the reference. Preserve the original facial proportions, eyes, nose, mouth, eyebrows, hairstyle and expression. Do not change the other people or the surrounding environment.
The principle is simple:
Fix the smallest possible area.
Every unnecessary regeneration creates another opportunity for something else to change.
Handling Overlapping People
Group photographs often contain overlapping bodies.
Someone may have an arm around another person’s shoulder. One person’s hand may appear in front of another person’s clothing. Two people may be standing very close together.
These situations are difficult for AI because the boundaries between subjects aren’t always obvious.
If you are editing an overlapping area, describe the relationships between the people.
For example:
Preserve the original positions and interactions between the people. Keep the visible arm, hand and shoulder relationships consistent with the source photograph.
This tells the model that those overlapping elements are meaningful rather than random shapes.
What About Hands?
Hands deserve their own inspection.
After an AI edit, look closely at:
- Number of fingers
- Finger positions
- Thumb placement
- Wrist connection
- Relationship between hand and object
- Hand-to-body proportions
If someone is holding a phone, bag, glass or another object, make sure the hand still connects naturally with it.
If only one hand is incorrect, make a localized correction instead of regenerating the whole image.
Preventing Unwanted Extra People
Background replacement can sometimes introduce figures that weren’t present in the original photograph.
This is particularly possible when you request a busy street, event, restaurant or tourist location.
If the original group must remain the same size, explicitly state:
Keep the original number of people in the photograph. Do not introduce additional primary subjects.
After the edit, physically count the people.
This is a simple check, but it can catch an obvious mistake before you publish the image.
Clothing Can Change Without You Asking
AI may reinterpret clothing when it is asked to create a new environment or photographic style.
A jacket may change color. A shirt pattern may disappear. Accessories may be replaced.
If clothing is not part of the edit, say so.
For example:
Preserve the original clothing, colors, patterns and accessories of every person.
If you actually want to change someone’s outfit, handle that as a separate creative edit rather than combining it with a complex group-photo transformation.
A Better Way to Handle Large Changes
Some transformations genuinely require substantial AI reconstruction.
For example, you might want to turn a daytime group photograph into a nighttime city scene.
That’s a much larger change than removing a background object.
Instead of expecting one instruction to solve everything, divide the project into stages.
First pass
Establish the new environment.
Second pass
Check faces and body proportions.
Third pass
Correct lighting and shadows.
Fourth pass
Fix small defects.
This staged approach makes it easier to identify exactly where a problem was introduced.
The “Unexpected Change” Test
There is a very useful way to review an AI-edited photograph.
Compare the original and edited versions side by side.
Don’t ask only:
Does the new image look better?
Ask:
What changed that I never requested?
For example, you may discover that:
- A shirt changed color
- Someone’s hairstyle changed
- A smile became different
- A watch disappeared
- A person became slightly taller
- The background added another person
- A hand changed position
These are unintended edits.
An attractive result isn’t necessarily a successful edit if it changes important information from the original photograph.
How to Decide Whether Another Edit Is Necessary
Before making another adjustment, identify the exact problem.
If the image already looks realistic, don’t keep editing it simply because AI can make more changes.
For example:
Problem: Background is distracting.
Solution: Replace or clean the background.
If the background is now good, stop.
Don’t automatically add cinematic lighting, skin retouching, new clothes and additional effects.
Every unnecessary edit increases the risk of damaging something that was already correct.
A Practical Group-Photo Editing Formula
Instead of memorizing dozens of prompts, use this simple structure:
Source → Change → Preserve → Match → Avoid
Source
Tell the AI to work from the uploaded photograph.
Change
Describe exactly what needs to be modified.
Preserve
List the important characteristics that should remain unchanged.
Match
Mention lighting, perspective, scale, shadows and photographic consistency when relevant.
Avoid
State the major unwanted changes.
For example:
Work from the uploaded group photograph. Change [specific element]. Preserve every person’s identity, expression, hairstyle, clothing, pose and body proportions. Match the new environment to the original camera perspective and lighting. Keep the same people and avoid unnecessary changes to unrelated areas.
This structure can be adapted to many editing situations without relying on a fixed collection of copy-paste prompts.
When You Should Use a Different Editing Method
AI isn’t always the best tool for every part of a group photograph.
If you need extremely precise control over a small object, traditional editing software may sometimes be more appropriate.
For example, a professional editor may prefer manual masking when:
- An exact edge must be preserved
- A person’s face cannot change at all
- A specific logo must remain identical
- A legal or archival photograph is being restored
- Precise object placement is required
AI is powerful, but it isn’t automatically the best solution for every editing task.
Keep the Original Photograph Safe
Always preserve the original file before experimenting.
Create a separate edited copy rather than repeatedly overwriting the original.
This gives you the ability to return to the source if an AI edit introduces unwanted changes.
It also allows you to compare different editing approaches without losing the original photograph.
Final Quality Review
Before sharing the edited group photograph, perform a close inspection.
Look at the image once normally and then zoom in.
Check:
- Faces
- Eyes
- Expressions
- Hair
- Clothing
- Hands
- Accessories
- Body proportions
- Feet
- Shadows
- Background perspective
- Number of people
- Small objects
- Overall lighting
Then compare the result with the original.
If something changed without a reason, consider correcting that specific area rather than regenerating the whole image.
Conclusion
Successful AI group-photo editing is less about adding as many effects as possible and more about controlling the boundaries of the edit.
Start with a good original photograph. Identify exactly what needs improvement and leave everything else alone. When several people are present, pay particular attention to faces, expressions, hands, clothing, proportions and interactions between subjects.
For major transformations, work in stages rather than asking the AI to completely recreate the photograph in one step.
And before publishing the result, compare it with the original and look specifically for changes you never requested.
The most convincing AI-edited group photographs are often the ones where the technology is difficult to notice—the background may be better, the lighting may be cleaner, and the composition may feel improved, while the people still look like the same people who were actually photographed.






