

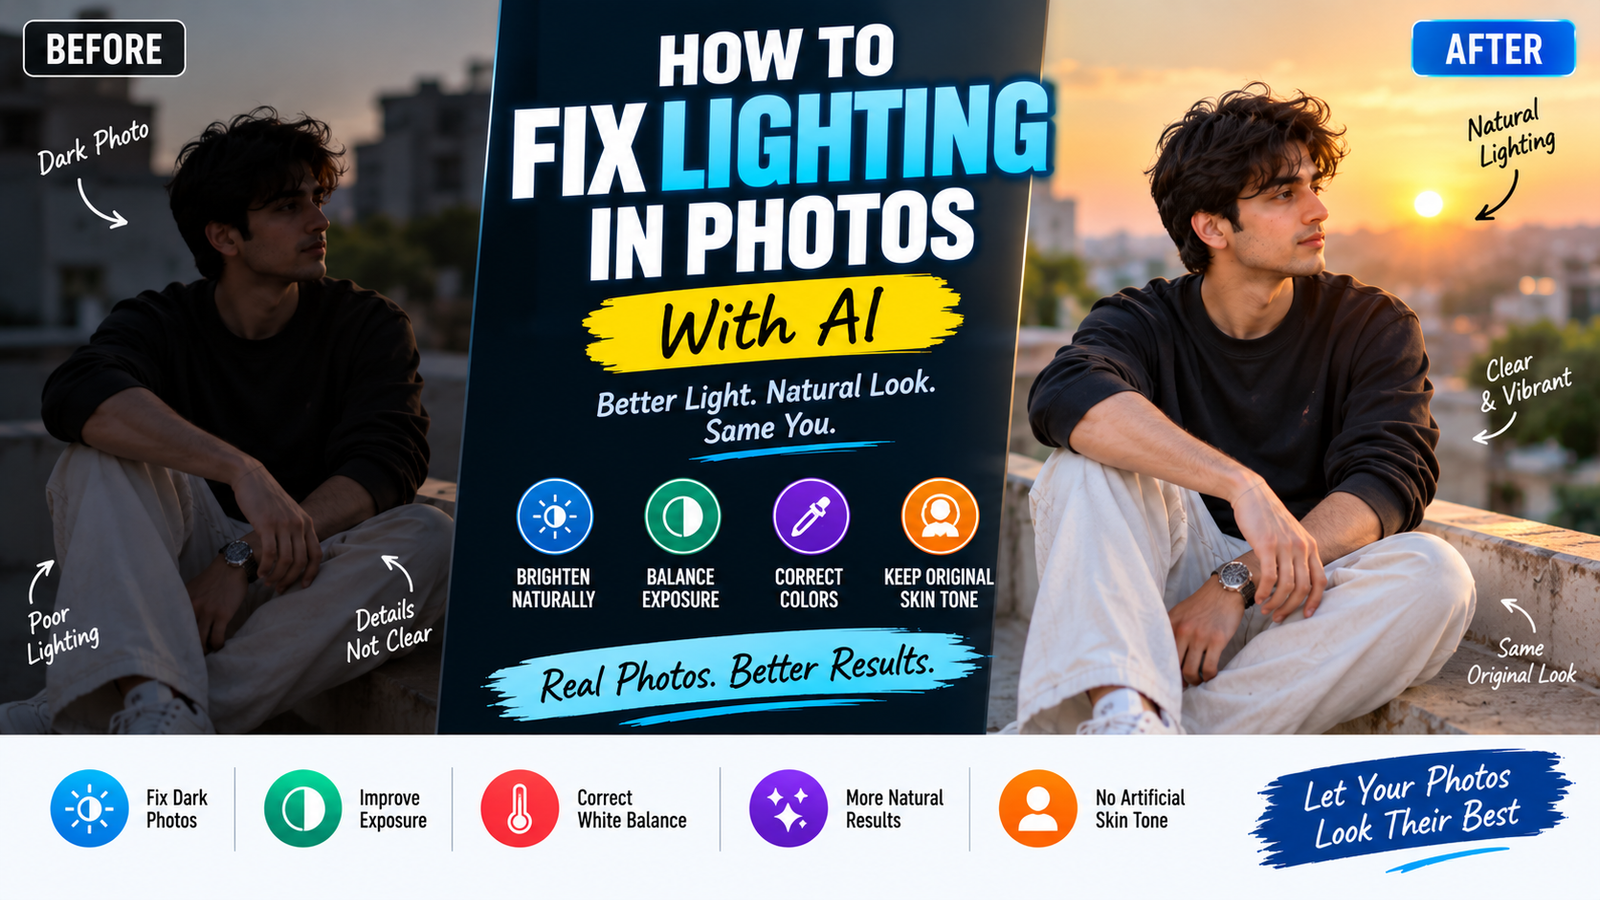
Lighting can completely change the way a photograph feels.
A good photo taken at the wrong time of day can look flat, dark, yellow, or washed out. A face may be partly hidden in shadow, the background may be much brighter than the subject, or indoor lighting may give the entire image an unnatural color cast.
AI photo editing can help correct many of these problems. The difficult part is making the lighting better without changing the person’s actual appearance.
A common AI editing mistake is to brighten a dark photograph and accidentally make the skin too pale. Another edit may add warm light but turn the entire face orange. Sometimes the AI changes facial details simply because it is trying to recreate the lighting.
The goal of good lighting correction is not to make the photograph look dramatically different. It is to make the existing photograph look as though it was captured under better, more balanced lighting.
What Makes Lighting Look Natural?
Before changing lighting with AI, it helps to understand what you’re actually trying to fix.
Good lighting usually has a believable relationship between:
- Bright areas
- Shadows
- Skin tone
- Background
- Light direction
- Color temperature
- Contrast
- Reflections
If one of these elements changes without the others, the edit can look artificial.
For example, making a person’s face brighter while leaving a strong shadow on the background may create an inconsistent result.
A natural lighting correction should make the entire scene feel more connected.
Start by Identifying the Actual Lighting Problem
Don’t begin by telling AI to “make the photo look professional.”
That’s too vague.
First decide what is wrong.
The photograph is too dark
The solution may be exposure and shadow recovery.
The face is darker than the background
The problem is subject-to-background lighting balance.
The image looks too yellow
The problem may be color temperature.
The photograph looks too blue
The white balance may be too cool.
The face has harsh shadows
The light may be too directional or too strong.
The image looks flat
The photograph may need better contrast rather than simply more brightness.
The background is extremely bright
The highlights may need to be controlled while preserving the subject.
Different problems require different solutions.
Brightness and Exposure Are Not the Same Thing
This is an important distinction when editing photographs.
Increasing brightness can make the entire image lighter.
Exposure adjustment is more closely related to the overall amount of light in the photograph.
If you simply ask AI to “brighten everything,” you may lose the natural relationship between highlights and shadows.
For example, a bright sky can become completely white while the person’s face still doesn’t look correct.
A better instruction is more specific:
Improve the overall exposure while recovering natural shadow detail and preserving highlight detail. Keep the subject’s original skin tone and facial appearance unchanged.
The objective is balance rather than maximum brightness.
Protect Skin Tone Before Changing Light
Skin tone is one of the easiest things for AI to alter unintentionally.
Warm lighting can make skin look orange.
Cool lighting can make it look pale or slightly blue.
Strong exposure changes can also remove natural tonal variation.
If the person’s appearance is important, include a preservation instruction:
Improve the lighting while maintaining the person’s natural skin tone and realistic facial texture. Do not make the skin excessively warm, pale, orange or artificially smooth.
This doesn’t guarantee perfect results with every AI tool, but it clearly communicates the goal.
Why “Golden Hour” Can Cause Problems
Golden-hour lighting looks attractive, which is why it appears frequently in AI photo prompts.
But simply telling an AI editor:
Make this golden hour.
can produce much more than a lighting adjustment.
The model may change:
- Skin tone
- Background colors
- Shadows
- Sky
- Clothing colors
- Overall contrast
- Facial appearance
If you only want warmer light, describe the lighting rather than transforming the entire scene.
For example:
Add subtle warm directional light similar to late-afternoon sunlight while preserving the original environment, skin tone, clothing and composition.
This is a much more controlled request.
Fixing a Dark Face Without Brightening the Whole Photograph
Imagine the background is already correctly exposed but the person’s face is too dark.
Increasing the exposure of the entire image could make the background too bright.
A better approach is to target the subject.
You could instruct the AI:
Improve the illumination on the person’s face and upper body while preserving the original background exposure. Use soft, natural fill light that matches the existing scene. Maintain the person’s original skin tone, facial features, clothing and expression.
The idea is to add believable illumination rather than simply increasing brightness everywhere.
What Is Fill Light?
Fill light is additional illumination used to reduce excessive shadows on a subject.
You can think of it as gently lifting the darker parts of the face without removing all shadows.
Natural-looking fill light should still leave some dimensionality.
If AI removes every shadow from a face, the result can become flat.
A realistic instruction could be:
Add subtle soft fill light to reduce harsh facial shadows while preserving natural facial depth and the existing direction of the main light.
The word subtle matters.
Don’t Remove Every Shadow
Shadows aren’t automatically a problem.
They help communicate:
- Depth
- Shape
- Light direction
- Facial structure
- Distance
If you tell AI:
Remove all shadows.
the face can become unnaturally flat.
Instead, decide which shadow is actually causing the problem.
For example:
Soften the harsh shadow on the left side of the face while retaining natural facial shading and the overall direction of the original light.
This creates a much more photographic result.
Understanding Warm and Cool Light
Light has different color temperatures.
Warm light tends toward:
- Yellow
- Orange
- Golden tones
Cool light tends toward:
- Blue
- Cyan
- Cooler neutral tones
Neither is automatically better.
The correct choice depends on the scene.
A bedroom photographed under a warm lamp can naturally have warm tones.
A photograph taken outdoors under overcast daylight may look cooler.
The goal isn’t to make every photograph warm.
The goal is to make the color of the light believable.
Fixing an Orange Skin Tone
Suppose an indoor photograph has strong yellow lighting.
AI may interpret the entire image as warm and increase the orange tones even more.
Instead of asking:
Make the skin natural.
Try:
Neutralize the excessive yellow-orange cast while preserving the person’s natural skin tone and realistic complexion. Keep the original lighting direction and natural facial texture.
This tells the AI that you’re correcting a color cast rather than redesigning the person.
Fixing a Blue or Cold Photograph
The opposite can also happen.
A photograph taken under cool artificial lighting may give skin a slightly blue or gray appearance.
A controlled correction could be:
Reduce the excessive cool blue color cast and restore a natural neutral skin tone. Preserve the original facial features, clothing colors, background and overall lighting direction.
Again, the goal is correction rather than a complete color transformation.
Lighting Direction Matters
A realistic edit needs a believable light source.
Imagine sunlight originally comes from the left side of the subject.
If AI brightens the right side as though the light is coming from there, the result may look unnatural.
When changing lighting, think about:
Where is the light coming from?
How strong is it?
How soft are the shadows?
Which parts of the subject should be brighter?
Where should the shadow fall?
You can tell AI:
Maintain the existing light direction and improve the exposure with softer, more balanced illumination.
This is often safer than completely changing the lighting setup.
Soft Light vs Hard Light
The character of the light matters.
Soft Light
Soft light creates gradual transitions between highlights and shadows.
It is common in:
- Portrait photography
- Window-light photography
- Overcast outdoor scenes
- Studio portraits
It can make an image feel calm and natural.
Hard Light
Hard light creates stronger shadows and more defined edges.
It can work well for:
- Dramatic portraits
- Direct sunlight
- Fashion photography
- Editorial images
The problem occurs when you ask for dramatic hard lighting on a photograph that originally had soft light without considering the rest of the scene.
The lighting style should match the photograph’s intended mood.
Fixing Harsh Midday Sun
Direct midday sunlight can create strong shadows under:
- Eyes
- Nose
- Chin
- Hair
- Neck
AI can sometimes soften these areas without completely changing the photograph.
A useful instruction is:
Soften the harsh midday facial shadows while preserving the direction and character of the original sunlight. Maintain realistic skin texture, facial structure and natural contrast.
Don’t ask AI to turn strong sunlight into completely flat studio lighting unless that’s actually what you want.
Window Light Can Be More Natural Than Studio Light
If you’re editing an indoor portrait, window-style light can often create a believable result.
For example:
Improve the indoor lighting using soft natural window light from the left side. Preserve the original room, person, clothing and facial features. Maintain realistic skin tone, gentle shadows and natural exposure.
The environment should support the lighting.
If there is a visible window in the room, the direction of the light should make sense.
Background and Subject Should Share the Same Light
This is one of the easiest ways to detect a poor AI lighting edit.
Imagine:
- Person = warm sunlight
- Background = cold blue shade
The two elements may appear disconnected.
A convincing edit should make the subject and environment feel as though they exist under the same lighting conditions.
When changing light, tell AI:
Maintain consistent illumination between the subject and background, including matching color temperature, shadow direction and ambient light.
This can be more important than adding dramatic effects.
Correcting a Backlit Photograph
Backlighting occurs when the strongest light source is behind the subject.
This can create a beautiful outline but may leave the person’s face too dark.
Instead of destroying the backlit effect, use controlled fill.
For example:
Preserve the existing backlit atmosphere while gently lifting the exposure on the subject’s face. Maintain natural skin tone, realistic facial detail and the original background highlights. Do not flatten the lighting or remove the backlight.
This keeps the character of the original photograph.
Don’t Over-HDR the Photograph
AI enhancement sometimes produces excessive local contrast.
The image may become:
- Extremely sharp
- Overly bright
- Highly saturated
- Full of exaggerated highlights
- Dark in the shadows
This can make a normal photograph look processed.
If realism is your priority, ask for:
Natural dynamic range with controlled highlights, preserved shadow detail and moderate contrast. Avoid excessive HDR, halos and artificial sharpening.
A photograph doesn’t need maximum contrast to look professional.
What About Night Photos?
Night photographs require a different approach.
The goal isn’t necessarily to make the entire scene bright.
A good night photograph should still look like nighttime.
If AI turns a dark street into something that looks like daytime, the result may lose the atmosphere of the original scene.
Instead, you can request:
Improve visibility while preserving the nighttime atmosphere. Recover useful shadow detail without making the scene look like daylight. Maintain realistic artificial light sources, natural skin tone and believable contrast.
This produces a more convincing result.
Keep Artificial Lights Believable
Night scenes often contain:
- Street lamps
- Storefront lights
- Car headlights
- Neon signs
- Indoor windows
If AI changes the lighting, these sources should still make sense.
For example, if a bright sign is on the left side of the subject, the resulting illumination should not suggest that the strongest light is coming from the opposite direction.
Lighting should have a reason.
Don’t Change Skin Tone to Match a Color Grade
Color grading and skin tone are related but shouldn’t be confused.
You can create a warm photograph while keeping natural skin.
For example:
Apply a subtle warm color grade to the environment while preserving accurate, natural skin tones.
This is better than applying the same warm color to every pixel.
If the skin becomes orange simply because the background is warm, the grade has gone too far.
A Practical Lighting Correction Workflow
Instead of asking AI to completely “enhance” the photograph, use a sequence.
Step 1: Find the Main Problem
Is it:
- Darkness?
- Harsh shadows?
- Wrong color temperature?
- Uneven exposure?
- Flat contrast?
- Backlighting?
Step 2: Preserve the Subject
Decide which details must not change.
For portraits, this usually includes:
- Face
- Skin tone
- Hair
- Expression
- Clothing
- Body proportions
Step 3: Fix Exposure
Recover useful detail without destroying highlights.
Step 4: Correct Color Temperature
Neutralize unwanted yellow, orange or blue casts.
Step 5: Balance Shadows
Soften distracting shadows without removing all facial depth.
Step 6: Check Background Consistency
Make sure the subject and environment still share believable lighting.
Step 7: Compare With the Original
Look for changes that weren’t requested.
This workflow is much safer than asking AI to “make the photo professional” in one step.
A Before-and-After Example
Imagine you have an outdoor portrait taken at around 4 PM.
The person is standing under partial shade.
The background is bright, but the face is slightly dark.
A poor instruction would be:
Make this photo bright and cinematic.
That gives AI too much freedom.
A better instruction is:
Improve the exposure of the existing outdoor portrait by gently lifting the shadow areas on the subject’s face and upper body. Preserve the person’s exact facial features, natural skin tone, hairstyle, clothing, pose and body proportions. Keep the original background and composition unchanged. Maintain the existing afternoon light direction and add only subtle natural fill light. Control the highlights in the bright background and avoid excessive contrast, orange skin tones or artificial HDR.
This instruction solves a specific problem without asking AI to redesign the photograph.
What If the Face Becomes Too Bright?
This is a common problem after AI lighting correction.
If the face looks much brighter than the surrounding environment, reduce the intensity rather than starting over with a completely different style.
Try:
Reduce the brightness of the subject’s face slightly so it blends naturally with the surrounding environment. Preserve natural skin tone, facial details and realistic shadow transitions.
The objective is integration.
The subject should belong to the scene.
What If Skin Becomes Orange?
Don’t simply ask for “normal skin.”
Explain the problem:
Correct the excessive warm orange cast on the skin while preserving natural complexion and the warm environmental lighting. Keep the original facial features and texture unchanged.
This tells AI that the warmth should remain in the environment without overwhelming the skin.
What If AI Changes the Face?
If the lighting edit causes facial changes, return to the original photograph whenever possible.
Then make the lighting instruction narrower.
Instead of:
Completely relight and enhance the portrait.
Use:
Adjust the existing exposure and shadow levels without regenerating or redesigning the person’s face.
If your editing tool supports a selected area, keep the correction focused on the lighting region rather than regenerating the entire photograph.
What If Clothing Colors Change?
Lighting edits can sometimes affect how clothing is interpreted.
For example, a black shirt may become dark brown under warm light.
If the actual clothing color matters, include:
Preserve the original clothing colors and material appearance while adjusting the surrounding illumination.
This is particularly important for fashion photographs and product-related images.
What If the Background Is Too Bright?
Instead of making the entire image darker, control the background highlights.
For example:
Reduce excessive background highlights while preserving the subject’s natural exposure. Maintain realistic detail in bright areas and keep the existing composition unchanged.
This creates a better balance without making the subject unnecessarily dark.
Natural Lighting Does Not Mean Flat Lighting
Sometimes people try to make AI photographs realistic by removing every dramatic element.
That’s not necessary.
Natural photographs can have:
- Strong sunlight
- Deep shadows
- Warm highlights
- Reflections
- Backlighting
- High contrast
The important part is consistency.
A dramatic photograph can still be realistic if the lighting behaves logically.
Use Lighting to Guide Attention
Lighting isn’t only about brightness.
It can help determine where the viewer looks first.
For a portrait, you might want slightly more emphasis on the face.
For a product photograph, you may want the product to receive the cleanest illumination.
For a travel photograph, you might want the subject and landscape to remain balanced.
Instead of simply increasing brightness, think about visual hierarchy.
Ask:
Where should the viewer look first?
Then use lighting to support that answer.
When You Shouldn’t Use AI for Lighting
AI isn’t always necessary.
If the photograph only needs:
- Slight exposure correction
- Small white-balance adjustment
- Basic contrast correction
a conventional photo editor may give you more predictable control.
AI becomes particularly useful when you need a more complex change, such as:
- Reconstructing lighting on a face
- Creating realistic environmental light
- Balancing a difficult background
- Simulating a different time of day
- Correcting a complicated lighting mismatch
Choose the simplest tool that solves the actual problem.
A Reusable AI Lighting Instruction
For general lighting correction, you can use this framework:
Improve the lighting of the uploaded photograph without changing the original subject or composition. Correct [SPECIFIC LIGHTING PROBLEM] while preserving the person’s facial identity, natural skin tone, hairstyle, clothing, body proportions and expression. Maintain realistic light direction, shadows, highlights and color temperature. Preserve natural texture and avoid excessive HDR, artificial glow, plastic-looking skin or oversaturated colors. Keep the final result consistent with a real photograph.
Replace the specific lighting problem with something like:
- uneven exposure
- harsh facial shadows
- excessive yellow cast
- cool blue cast
- underexposed subject
- blown highlights
- flat indoor lighting
This gives you a starting framework without turning every photograph into the same visual style.
How to Judge the Final Lighting
After editing, don’t look only at the face.
Check the entire photograph.
Skin
Does the skin still look natural?
Eyes
Are there realistic highlights without excessive brightness?
Hair
Does the light behave naturally across the hair?
Clothing
Did the color remain accurate?
Background
Does it share the same lighting conditions?
Shadows
Are they consistent with the light source?
Highlights
Are bright areas still detailed?
Color
Does the photograph have a believable color temperature?
Contrast
Does the image still have natural depth?
Overall impression
Does it look like a photograph or an obvious AI edit?
The last question is often the most useful.
The Original Should Always Be Your Reference
Before editing, save the original photograph.
After editing, compare both versions.
Look specifically for things you did not request.
Maybe:
- The face changed
- Skin became orange
- A shirt changed color
- The background became brighter
- Shadows disappeared
- Hair became unnaturally sharp
If the lighting is better but these unwanted changes have appeared, the edit isn’t successful yet.
A good AI edit should solve the lighting problem without creating new problems.
Final Principles for Realistic AI Lighting
Keep these principles in mind:
Fix the actual problem.
Don’t ask AI to redesign the entire photograph.
Protect natural skin tone.
Warm lighting doesn’t mean orange skin.
Keep a believable light direction.
Highlights and shadows should agree.
Don’t remove every shadow.
Some shadow creates depth.
Control highlights.
A brighter image isn’t automatically a better image.
Match subject and background.
They should appear to exist under the same light.
Use subtle corrections first.
You can always make another adjustment later.
Compare with the original.
This catches changes that may not be obvious at first glance.
Conclusion
AI lighting correction works best when you treat it as a controlled photographic adjustment rather than a complete image transformation.
Start by identifying the real problem—perhaps the face is too dark, the photograph has a strong color cast, the shadows are too harsh, or the background is incorrectly exposed.
Then make the smallest useful change.
Protect the person’s natural skin tone, facial characteristics, clothing and composition. Keep the direction and character of the light believable, and avoid excessive HDR, artificial glow and aggressive color grading.
Most importantly, don’t judge the result only by whether it looks brighter or more dramatic.
A successful lighting edit should make you feel that the photograph was captured under better light in the first place.
That is the difference between an obvious AI transformation and a convincing photographic correction.






