

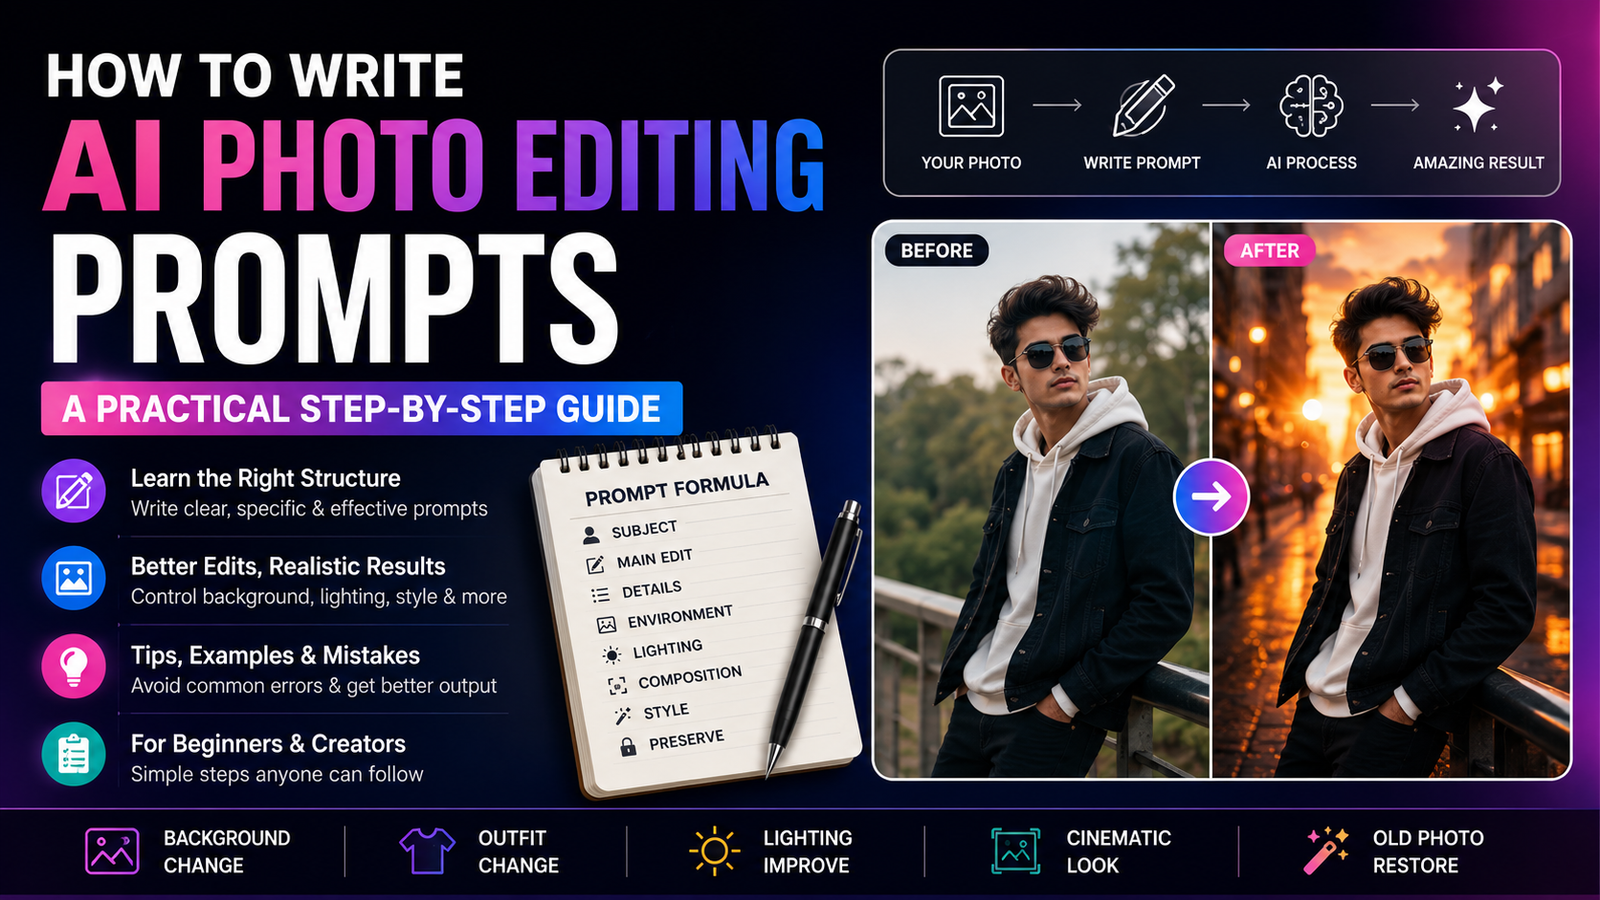
AI photo editing has made creative image editing much easier. You can describe a new background, outfit, lighting setup, photography style, or atmosphere in words and let an AI-powered image tool interpret those instructions.
But getting a good result is not always as simple as writing a few keywords.
A prompt that is too short may leave important details to the AI. A prompt that is unnecessarily long may contain conflicting instructions. The best approach is to describe the intended visual result clearly, logically, and specifically.
In this guide, you’ll learn how to write better AI photo editing prompts from scratch, how to structure different types of edits, how to preserve important parts of an original photograph, and how to improve a prompt when the first result isn’t what you expected.
What Is an AI Photo Editing Prompt?
An AI photo editing prompt is a written instruction that explains how an AI image editor should modify an image.
For example, a simple instruction might say:
“Change the background to a beach.”
A more detailed instruction could say:
“Replace the existing background with a realistic tropical beach during late afternoon. Keep the person, facial features, hairstyle, clothing and pose unchanged. Match the subject’s lighting with the warm sunlight and add a natural depth of field.”
Both prompts describe a background change, but the second one provides much more useful context.
A good prompt doesn’t need to be complicated. It needs to communicate the right information.
Why Prompt Structure Matters
AI image tools don’t always interpret instructions exactly like a human designer would.
If you write:
“Make my photo cinematic.”
the AI has to decide what “cinematic” means.
It might change the:
- lighting
- colors
- background
- contrast
- composition
- skin tones
- overall atmosphere
If you want more control, explain the characteristics you actually want.
For example:
“Give the portrait a cinematic photography appearance with soft directional lighting, natural skin texture, subtle contrast, shallow depth of field and a slightly darker background.”
Now the visual direction is much clearer.
The 8 Parts of an Effective Prompt
A useful AI photo editing prompt can contain eight main components:
- Reference image
- Subject
- Main edit
- Appearance or details
- Environment
- Lighting
- Composition
- Elements to preserve
You don’t need all eight for every edit. Use the parts that are relevant to the result you want.
1. Start With the Reference Image
If you’re editing an existing photograph, tell the AI that the uploaded image is the primary reference.
For example:
“Use the provided photograph as the primary reference for the subject.”
This establishes that you’re asking for an edit of the existing image, rather than an entirely unrelated image.
If maintaining the subject’s appearance is important, continue with:
“Preserve the subject’s recognizable facial features and overall appearance.”
2. Clearly Describe the Subject
Tell the AI what it is editing.
For example:
“Edit the provided full-body portrait of a person standing outdoors.”
You can add relevant information such as:
- portrait
- full-body photograph
- product image
- couple photograph
- family photograph
- landscape
- old photograph
Avoid unnecessary descriptions that don’t contribute to the edit.
3. State the Main Change First
The main change should be easy to identify.
For example:
“Replace the existing background with a modern city street.”
Or:
“Change the outfit while keeping the original pose.”
Or:
“Restore the damaged areas of the old photograph.”
This is usually more useful than beginning with a long list of visual adjectives.
4. Describe the New Details
Once you’ve explained the main change, describe the desired result.
For an outfit:
“Add a relaxed-fit black jacket, plain white T-shirt, dark trousers and clean white sneakers.”
For a background:
“Create a modern downtown street with subtle storefront lights and a softly blurred background.”
For a studio setup:
“Place the product on a clean neutral studio surface with a minimal background.”
Specific details give the AI a clearer target.
5. Explain the Environment
The environment affects how realistic the final image appears.
Consider describing:
Location
- city street
- studio
- beach
- mountain
- cafe
- indoor room
- garden
Time
- morning
- afternoon
- sunset
- blue hour
- nighttime
Atmosphere
- peaceful
- dramatic
- modern
- minimal
- energetic
- luxurious
For example:
“Place the subject on a quiet city street during golden hour with warm sunlight and subtle background activity.”
6. Add Appropriate Lighting
Lighting can make the difference between a convincing edit and an obviously artificial one.
Useful lighting descriptions include:
- soft natural light
- warm golden-hour light
- diffused studio light
- directional side lighting
- subtle rim lighting
- soft shadows
- dramatic low-key lighting
For example:
“Use warm directional sunlight from the side with soft realistic shadows.”
The lighting should make sense for the environment.
If you create a nighttime scene, don’t simultaneously request bright midday sunlight unless that contrast is intentional.
7. Describe the Composition
Composition explains how the image should be framed.
Examples:
“Use a waist-up portrait composition.”
“Keep the subject centered with enough space around the body.”
“Use a wider environmental composition showing the surrounding city.”
“Maintain the original camera perspective.”
You can also mention depth of field when appropriate:
“Use a shallow depth of field with the subject in sharp focus and the background softly blurred.”
8. Tell the AI What Not to Change
This is particularly important when editing photographs of people.
You may want to preserve:
- facial structure
- hairstyle
- expression
- pose
- body proportions
- identity
- clothing
- important objects
For example:
“Keep the person’s facial features, hairstyle, expression, body proportions and pose unchanged.”
This doesn’t guarantee perfect preservation because different AI tools have different editing capabilities, but it provides a clearer instruction.
A Simple Prompt Formula
You can use this formula for many AI photo editing projects:
Use the provided image as the primary reference. Edit [subject] by changing [main element] to [desired result]. Keep [important elements] unchanged. Add [environment/details]. Use [lighting] and [composition]. Create a [style] appearance with realistic textures, proportions and natural integration.
Example
“Use the provided portrait as the primary reference. Edit the subject by replacing the existing background with a modern rooftop overlooking a city at sunset. Keep the facial features, hairstyle, expression, clothing, pose and body proportions unchanged. Use warm golden-hour lighting, realistic shadows and shallow depth of field. Maintain the original camera perspective and create a natural cinematic photography appearance.”
This structure can be adapted for many different edits.
AI Photo Editing Prompt Examples
Background Replacement
Use the provided portrait as the primary reference. Replace the existing background with a realistic modern city street during golden hour. Keep the person’s facial features, hairstyle, expression, clothing, pose and body proportions unchanged. Match the lighting on the subject with the new environment and add realistic shadows and natural depth of field. Maintain the original camera perspective and create a photorealistic result.
Outfit Transformation
Edit the provided photograph by replacing the existing outfit with a modern casual streetwear look consisting of an oversized neutral jacket, plain T-shirt, relaxed-fit trousers and clean sneakers. Preserve the person’s facial features, hairstyle, expression, pose and body proportions. Make the clothing folds, material texture, shadows and highlights consistent with the original lighting.
Cinematic Portrait
Transform the provided portrait into a realistic cinematic photograph. Preserve the subject’s facial appearance, hairstyle, expression and pose. Use soft directional lighting, subtle contrast, natural skin texture, shallow depth of field and a softly blurred urban background. Keep the image realistic and avoid excessive color grading or artificial skin smoothing.
Studio Portrait
Convert the provided portrait into a professional studio photograph. Keep the person’s facial features, hairstyle, expression and clothing unchanged. Add a clean neutral studio background with soft diffused key lighting and subtle shadows. Maintain realistic skin texture, natural proportions and professional photographic composition.
Old Photo Restoration
Restore the provided old photograph while preserving the original people, facial features, expressions and composition. Remove visible scratches, dust, stains and minor damage. Improve clarity, contrast and tonal balance while keeping the historical appearance natural. Do not redesign faces or introduce unrelated details.
How to Write a Prompt for Instagram Photos
Social media images often benefit from a clear composition and strong visual style.
For example:
“Edit the provided portrait for a polished Instagram-style photograph. Keep the person’s facial features, hairstyle and outfit unchanged. Place the subject in a modern outdoor setting with warm evening light, soft background blur and clean composition. Maintain realistic skin texture and natural proportions.”
You can adjust the prompt depending on whether you’re creating a:
- fashion photograph
- travel image
- lifestyle portrait
- street photograph
- cinematic portrait
- minimalist image
How to Improve Realism
Realism usually comes from consistency, not from adding dozens of adjectives.
Make sure these elements work together:
Background
Describe a believable environment.
Lighting
Match the light source to the environment.
Shadows
Ask for natural shadows where appropriate.
Perspective
Maintain the original camera perspective when necessary.
Texture
Mention realistic skin, fabric or surface textures when they matter.
Proportions
Tell the AI to maintain natural body or object proportions.
For example:
“Match the subject’s lighting, perspective and shadows to the new environment for a naturally integrated result.”
This can be more useful than simply writing “ultra realistic.”
Don’t Overuse Words Like “Ultra Realistic”
Many prompts repeatedly use words such as:
- ultra realistic
- extremely detailed
- 8K
- masterpiece
- stunning
- perfect
- amazing
These words don’t necessarily provide meaningful instructions.
Instead of:
“Ultra realistic stunning amazing 8K cinematic photo.”
Try:
“Use realistic skin texture, natural lighting, accurate proportions, subtle shadows and a shallow depth of field.”
The second instruction describes specific visual characteristics.
How to Handle AI Mistakes
Your first result may not be perfect.
For example, suppose you asked for a new outfit but the AI also changed the face.
Instead of completely rewriting the prompt, refine the relevant instruction:
“Keep the original facial structure, eyes, nose, lips, hairstyle and expression unchanged. Only modify the clothing.”
If the background looks artificial:
“Blend the subject naturally with the environment and match the direction, intensity and color of the lighting.”
If clothing looks unrealistic:
“Maintain natural fabric folds, seams, shadows and material texture.”
Small targeted changes can be easier to evaluate than rewriting everything.
Common Prompt Writing Mistakes
Mistake 1: Giving Very Short Instructions
“Change background.”
Better:
“Replace the background with a modern rooftop at sunset while preserving the subject and matching the original lighting.”
Mistake 2: Changing Everything at Once
If you ask the AI to change:
- face
- hairstyle
- clothing
- pose
- background
- lighting
- camera angle
in a single edit, the result may become unpredictable.
When possible, make major changes in stages.
Mistake 3: Contradictory Instructions
Avoid combinations such as:
“Dark nighttime environment with bright midday sunlight.”
unless the contradiction is deliberately part of the creative concept.
Mistake 4: Ignoring the Original Image
When editing a reference photo, specify what the AI should preserve.
This is especially useful for people, products and important objects.
Mistake 5: Adding Unnecessary Keywords
More words don’t automatically mean a better prompt.
Every instruction should have a purpose.
A Better Prompt Refinement Method
Instead of changing ten things after every generation, follow a simple process.
First result
Look at the image carefully.
Identify one problem
For example:
The background looks artificial.
Add one targeted instruction
“Make the background perspective, lighting and depth of field consistent with the subject.”
Generate again
Then evaluate the new result.
This makes it easier to understand which instruction actually improved the image.
How to Build Reusable Prompt Templates
You don’t have to write every prompt from the beginning.
Create templates for common editing tasks.
Background Template
“Replace the existing background with [environment]. Keep [elements] unchanged. Match the lighting, perspective and shadows to the new environment.”
Outfit Template
“Replace the existing outfit with [clothing]. Preserve [facial features/pose/body proportions]. Make fabric texture, folds and lighting realistic.”
Cinematic Template
“Create a cinematic photography appearance using [lighting], [color atmosphere], [depth of field] and [background]. Preserve [important elements].”
Restoration Template
“Restore the provided photograph by removing [damage]. Preserve the original [people/composition/details] and maintain a natural appearance.”
These templates can become the foundation of your own prompt library.
Choosing the Right Level of Detail
Not every image requires a long prompt.
Simple edit
For a basic background change:
“Replace the background with a realistic mountain landscape while keeping the subject unchanged.”
This may be enough.
Complex edit
For a detailed cinematic transformation:
“Replace the background with a misty mountain valley at sunrise. Preserve the subject’s face, hairstyle, clothing and pose. Add soft warm sunlight from the side, natural atmospheric haze, realistic shadows and shallow depth of field while maintaining the original camera perspective.”
The complexity of the prompt should match the complexity of the edit.
Check Your Prompt Before Using It
Use this quick checklist:
Subject
Have I clearly explained what is being edited?
Main change
Have I described exactly what I want changed?
Preservation
Have I said what must remain unchanged?
Environment
Is the new background or setting clear?
Lighting
Does the lighting make sense?
Composition
Have I explained the framing if it matters?
Realism
Have I included relevant details such as shadows, perspective or textures?
Consistency
Are any instructions contradictory?
Simplicity
Can I remove unnecessary words without losing useful information?
If your prompt passes this checklist, it is ready to test.
AI Photo Editing Prompts vs. AI Image Generation Prompts
These two types of prompts are related but aren’t always identical.
An AI image generation prompt usually describes an image that needs to be created from scratch.
An AI photo editing prompt starts with an existing image and explains how that image should be modified.
For example:
Image generation:
“A cinematic portrait of a person walking through a rainy city at night.”
Photo editing:
“Use the provided portrait and place the subject in a rainy city at night while preserving the person’s facial features, clothing and pose.”
The second prompt establishes a relationship with an existing image.
Final Thoughts
Learning to write AI photo editing prompts is mainly about learning how to describe a visual idea clearly.
Start with the main edit, then add only the details that matter: environment, appearance, lighting, composition and elements that need to remain unchanged.
When the result isn’t right, don’t immediately make the prompt much longer. Identify the specific problem and add a targeted instruction.
With practice, you can create reusable templates for background changes, outfit transformations, cinematic portraits, restoration, social-media photography and many other creative edits.
The goal isn’t to write the longest prompt possible. The goal is to write an instruction that gives the AI clear, relevant and consistent visual information.
Better prompts come from better descriptions, not simply more words.






