

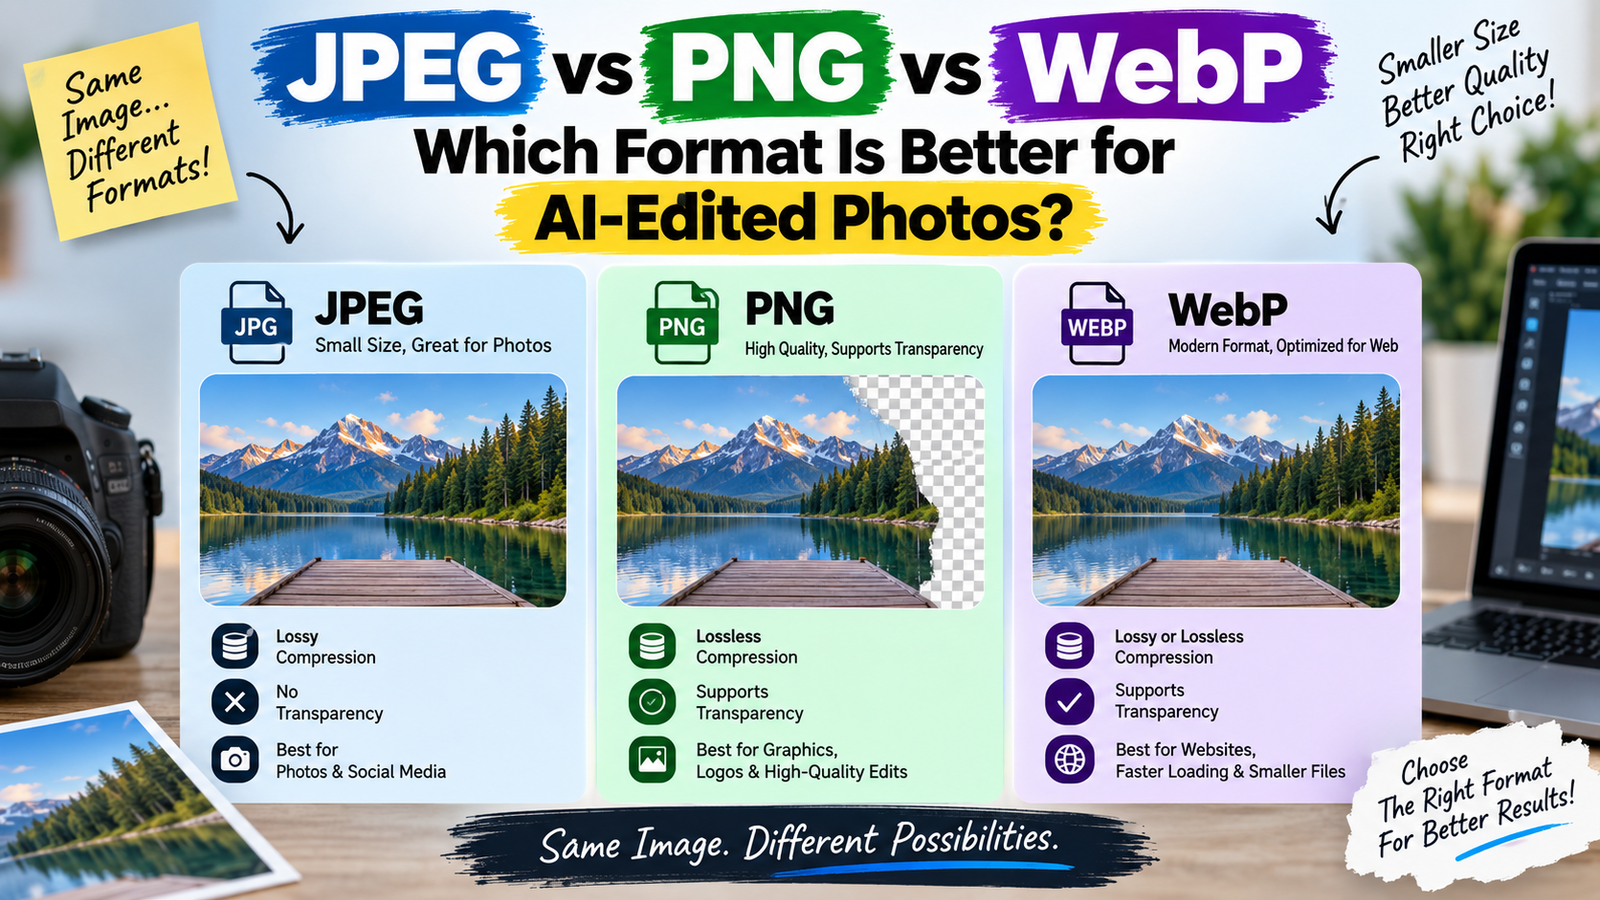
If you edit photos with AI, you may have noticed that the same image can look slightly different after saving it in another format. Sometimes the file becomes much smaller, sometimes fine details look softer, and in other cases a transparent background suddenly turns white.
So, JPEG vs PNG vs WebP isn’t just a technical question. The format you choose can affect image quality, file size, transparency, website speed, and how useful the final image is for its intended purpose.
There isn’t one format that is always the best.
For an AI-edited portrait that you’re uploading to Instagram, your choice may be different from an image you’re placing on a website. A product image with a transparent background has different requirements again.
This guide breaks down what actually changes between JPEG, PNG, and WebP and explains which one makes sense in different situations.
Why Image Format Matters After AI Editing
When you edit an image with an AI tool, you normally start with one file, make changes, and then save the result.
That final save is important.
An AI editor may produce a high-quality image, but if you repeatedly save and compress it using a lossy format, you can gradually lose some fine detail.
This is particularly noticeable in:
- Hair
- Skin texture
- Small text
- Fine clothing patterns
- Sharp edges
- Product details
- Gradients
- Shadows
The difference may be difficult to notice on a phone screen.
Open the same image at a larger size, though, and compression artifacts can become much easier to spot.
That’s why choosing the format should be part of your editing workflow rather than something you decide at the very end without thinking about it.
JPEG vs PNG vs WebP at a Glance
Before getting into the details, here’s the simple version:
| Format | Compression | Transparency | Best Use |
|---|---|---|---|
| JPEG | Lossy | No | Photos, social media, general sharing |
| PNG | Lossless | Yes | Graphics, transparent images, screenshots |
| WebP | Lossy or lossless | Yes | Websites and modern web images |
The important thing to notice is that WebP can use either lossy or lossless compression.
So calling WebP simply a “compressed format” doesn’t tell the whole story.
What Is JPEG?
JPEG is one of the most widely used image formats for photographs.
You’ve probably encountered .jpg or .jpeg countless times.
It is particularly useful when you have a photograph with lots of colors, gradients and natural detail and want a reasonably small file.
JPEG uses lossy compression.
That means some image information is discarded when the file is compressed.
The advantage is a much smaller file.
The disadvantage is that the saved image isn’t exactly identical to the original.
For normal photographs, that trade-off is often perfectly acceptable.
Why JPEG Works Well for AI-Edited Photos
JPEG is a practical choice when your final image is simply going to be viewed as a photograph.
For example:
- Instagram posts
- WhatsApp sharing
- Blog featured images
- General website photography
- Personal photo collections
- Online galleries
A well-compressed JPEG can look very good while taking considerably less storage space than an uncompressed or losslessly compressed image.
This is particularly useful for websites where large image files can affect page loading.
The Problem With Repeated JPEG Saving
Here’s something worth remembering.
Suppose you have an AI-edited image.
You save it as JPEG.
Then you open that JPEG in another editor, make a small change, and save it as JPEG again.
Then you repeat the process.
Each lossy save can introduce additional compression.
Over time, you may notice:
- Blocky areas
- Smudged fine details
- Less precise edges
- Ringing around text
- Loss of subtle texture
This doesn’t mean JPEG is bad.
It means you shouldn’t use a compressed JPEG as your master editing file if you expect to keep editing the image.
Keep the highest-quality original you have and export a JPEG copy for sharing when appropriate.
What Is PNG?
PNG takes a different approach.
It uses lossless compression, meaning the image data can be preserved without the same type of quality loss associated with JPEG compression.
PNG also supports transparency.
That combination makes it particularly useful for graphics and images where exact edges or transparent areas matter.
Examples include:
- Logos
- Screenshots
- UI graphics
- Text-heavy images
- Transparent cutouts
- Product objects on transparent backgrounds
- Simple illustrations
PNG isn’t automatically better than JPEG.
It’s simply designed for different situations.
Why PNG Can Be Useful for AI Editing
Imagine you ask an AI editor to isolate a product from its background.
You now have a product cutout that you want to place on:
- A website
- A poster
- Another photograph
- A promotional graphic
- A product banner
If you need the area around the product to remain transparent, PNG is a natural choice.
JPEG can’t store transparency.
If you save that same transparent image as JPEG, the transparent area has to become an actual background color, usually something like white.
That’s a major difference.
PNG Isn’t Always the Best Choice for Normal Photos
This is where people sometimes make a mistake.
Because PNG is lossless, it can sound like the obvious choice for every image.
But a full-resolution photograph can become significantly larger as a PNG than as a well-compressed JPEG.
For a normal photo containing:
- Sky
- Skin
- Trees
- Buildings
- Shadows
- Gradients
- Thousands of colors
JPEG can often provide a much smaller file with visually acceptable quality.
If your image doesn’t need transparency or the specific advantages of PNG, using PNG for every photograph may simply create unnecessarily large files.
What Is WebP?
WebP is a modern image format designed with web delivery in mind.
One of its useful characteristics is flexibility.
WebP supports both:
- Lossy compression
- Lossless compression
It also supports transparency.
That makes it suitable for many different website scenarios.
For a website owner, this can be particularly useful because you can often get a good balance between visual quality and file size.
Why WebP Is Interesting for AI-Edited Images
AI-generated and AI-edited images can be quite large.
A high-resolution portrait may contain a lot of visual information, and keeping every image unnecessarily large can make a website heavier than it needs to be.
WebP gives website publishers another option.
You can export an edited image in a format designed for efficient web delivery while retaining good visual quality.
For blog images, thumbnails and other website graphics, this can be a practical choice.
JPEG vs PNG vs WebP: Which One Keeps More Quality?
There isn’t a simple answer without considering the compression settings.
PNG
PNG uses lossless compression, so it doesn’t throw away image information in the same way JPEG’s lossy compression does.
JPEG
JPEG is lossy, so the amount of compression affects the final quality.
WebP
WebP can be either lossy or lossless, so its behavior depends on how the file was exported.
This means you shouldn’t compare formats only by their names.
The actual export settings matter too.
A poorly compressed WebP isn’t automatically better than every JPEG.
Likewise, a high-quality JPEG can look excellent.
What Should You Use While Editing?
This is slightly different from asking what format you should use for publishing.
During an editing workflow, your priority should be preserving the best available source.
If your editing application provides a project format or another method of retaining the original data, keep that master version.
Then create an export specifically for the final purpose.
Think of it like this:
Master file → Editing → Final export
rather than:
JPEG → Edit → JPEG → Edit → JPEG → Edit
The second workflow can gradually degrade the image if you’re repeatedly applying lossy compression.
What Format Is Best for Instagram?
For a normal photographic post, JPEG is usually a practical choice.
Instagram and other social platforms process uploaded images themselves, so there is little benefit in keeping an enormous file just because the original AI tool generated one.
Before uploading, make sure:
- The image is sharp
- Skin looks natural
- Colors are correct
- Important details aren’t already damaged
- The final crop is correct
If you’re interested in maintaining a consistent visual style across your social content, you may also find our guide on creating consistent Instagram photos with AI useful.
What Format Is Best for a Website?
For website images, WebP is often an excellent option to consider.
Why?
Because websites have an additional concern that social media doesn’t expose in quite the same way:
page performance.
Large image files have to be downloaded by visitors.
If your article contains ten large images, even a small reduction in the size of each image can add up.
WebP can provide a useful balance between image quality and file size.
That doesn’t mean you should convert every image blindly.
Check the result after conversion.
If text becomes difficult to read or fine details disappear, adjust the compression or use another format.
What Format Is Best for a Transparent AI Image?
If transparency is required, JPEG is immediately ruled out.
You would normally consider:
PNG or WebP.
Both can support transparent images.
The choice then depends on where you’re using the file.
For a graphic that needs broad compatibility with editing software, PNG can be convenient.
For a website where file size matters, transparent WebP can be a useful option.
The important thing is to check that your chosen workflow actually preserves the transparency when exporting.
What About AI-Created Product Images?
Product photography deserves a little extra care.
Suppose AI has edited a photograph of a watch, headphone, bottle or piece of clothing.
You may need to preserve:
- Product shape
- Logo
- Label
- Fine edges
- Color
- Texture
- Small printed details
For a normal product photograph on a website, JPEG or WebP may work well.
For a transparent product cutout, PNG or transparent WebP may be more appropriate.
But don’t assume a smaller file is automatically better.
If the product contains tiny text or intricate details, compare the exported version with the original before publishing it.
Our guide on AI product photo editing goes deeper into preserving product details during AI editing.
Why Text and Graphics Can Look Better in PNG
Photographs and graphics behave differently under compression.
Consider a simple graphic containing:
AI PHOTO EDITING
in large black letters on a white background.
JPEG compression can sometimes introduce subtle artifacts around sharp text and edges.
PNG is often better suited to this kind of image because it preserves those hard edges cleanly.
That’s why PNG is commonly useful for:
- Screenshots
- Infographics
- Logos
- Text graphics
- Interface captures
If your AI-edited image is primarily a photograph, though, the advantage isn’t necessarily as significant.
What Happens to Transparency When You Save as JPEG?
This is an easy mistake to make.
Imagine you’ve removed the background from a person and have a transparent cutout.
You save it as PNG.
The background remains transparent.
Later, you convert it to JPEG.
Now the transparent area has to be replaced with a solid background.
So if you’re planning to place that person over another background later, don’t convert the master cutout to JPEG.
Keep the transparent version.
Create a JPEG only when you’re ready for a final image that doesn’t require transparency.
Does Changing JPEG to PNG Restore Lost Quality?
No.
This is a very common misunderstanding.
Suppose an image was heavily compressed as JPEG.
You convert that JPEG to PNG.
The new PNG may technically be losslessly compressed from that point onward, but it cannot restore information that was already discarded by the JPEG compression.
You’re essentially putting the existing pixels into a different container.
The same principle applies when you convert a low-quality image into another format.
Changing the extension doesn’t recreate missing detail.
What About Converting PNG to JPEG?
This can be perfectly reasonable when you no longer need transparency.
For example, you have a PNG photograph that is unnecessarily large.
If it is going to be used as a normal website photo, exporting a high-quality JPEG may reduce the file size significantly.
But inspect the result.
If the image contains very fine text, sharp graphics or transparency, JPEG may not be the right final format.
Should You Convert Every AI Image to WebP?
Not necessarily.
If you’re publishing a large number of images on a website, WebP is worth considering.
But conversion should be treated as an optimization step, not a rule.
Check:
- Original image quality
- Exported WebP quality
- File size
- Transparency requirements
- Where the image will be used
If the converted image looks just as good at a substantially smaller size, great.
If important details become noticeably worse, change the export settings.
AI Editing and Image Compression Are Two Different Things
It’s useful to separate these concepts.
AI editing changes the content of the image.
For example:
- Change background
- Remove an object
- Adjust lighting
- Change hair color
- Improve composition
Compression changes how the image data is stored.
For example:
- JPEG compression
- Lossless PNG compression
- WebP lossy compression
- WebP lossless compression
You can have an excellent AI edit that is later ruined by excessive compression.
You can also have a perfectly optimized image format containing an AI edit that looks unnatural.
One doesn’t automatically fix the other.
A Simple Workflow for AI-Edited Photos
Here’s a practical workflow that avoids most unnecessary quality loss.
Keep the original
Save the original photograph before starting.
Make your AI edits
Do your background, lighting, color or composition changes.
Review the result
Look closely at faces, hair, text, edges and important details.
Keep a high-quality master
Don’t replace your original with a compressed export.
Export for the destination
Use the format that suits where the image is going.
Check the final file
Open the exported version before publishing.
This last step is surprisingly useful.
Sometimes an image looks perfect in the editing application but noticeably different after export.
Which Format Should You Choose?
If you want a simple decision guide:
Choose JPEG when:
- You’re saving a normal photograph
- You don’t need transparency
- You’re sharing the image socially
- File size matters
- The image contains natural photographic detail
Choose PNG when:
- You need transparency
- You’re working with graphics
- The image contains sharp text
- You need lossless compression
- You’re creating a cutout or graphic asset
Choose WebP when:
- You’re publishing on a website
- You want efficient file sizes
- You need transparency with web delivery
- You want either lossy or lossless compression depending on the situation
There is no reason to force one format onto every image.
What About Your Blog’s Featured Images?
For a website like an AI photo-editing blog, featured images are usually photographs or designed thumbnails.
If the image is a normal photographic banner, JPEG can be perfectly suitable.
If it contains lots of typography and graphic elements, PNG may sometimes preserve those details better.
For web delivery, WebP can be a good optimization option if the resulting image still looks clean.
The important thing is not to chase the smallest possible file.
You want the smallest file that still looks good.
That’s a much more useful target.
Does Image Format Affect SEO?
The format itself isn’t a magic SEO ranking factor.
What matters more is the overall experience around the image.
A website with unnecessarily huge images can have performance problems.
A website that serves appropriately sized, well-compressed images can provide a better experience for visitors.
So don’t think:
“WebP means Google will rank my article.”
Think:
“Can I deliver this image efficiently without sacrificing the quality the reader actually needs?”
That’s the better approach.
Don’t Sacrifice Quality Just to Save a Few Kilobytes
Image optimization can go too far.
If a photograph contains an important face and you compress it until the skin looks muddy, you’ve saved storage at the expense of the image.
Likewise, if an AI-generated product image contains small text and compression makes the text unreadable, the smaller file isn’t an improvement.
Optimization should always have a quality limit.
For most blog images, you don’t need pixel-perfect preservation of every microscopic detail.
But you also shouldn’t deliberately destroy visible details just to make the file smaller.
A Practical Example
Imagine you’ve created an AI-edited portrait for a blog.
The original AI output is a large high-quality image.
You want to use it in three places.
Export a high-quality JPEG suitable for the platform.
Website article
Use an appropriately sized WebP if your website workflow supports it and the quality remains good.
Future graphic editing
Keep the original high-quality file instead of repeatedly editing the compressed website version.
Same image.
Three different purposes.
There is no need for all three files to be identical.
The Best Format Depends on the Job
This is the main point to remember.
JPEG isn’t “better” than PNG.
PNG isn’t “better” than WebP.
WebP isn’t automatically better than JPEG.
They solve different problems.
JPEG is extremely practical for everyday photographs.
PNG is valuable when transparency and lossless image data matter.
WebP is particularly useful for modern web delivery because it supports both lossy and lossless compression while also supporting transparency.
The right choice depends on what you’re doing with the image.
Final Recommendation
For most AI-edited photographs, I would keep a high-quality original as the master and then export different versions for different purposes.
Use JPEG when you simply need a normal photograph for sharing or general use.
Use PNG when transparency, graphics, screenshots, or lossless preservation are important.
Use WebP when you’re publishing images on a website and want a strong balance between visual quality and file size.
And don’t forget the most important rule: changing an image format cannot recover detail that was already lost.
So make your AI edits first, keep your best-quality source, and treat compression as the final delivery step rather than something you repeatedly apply during editing.
That simple workflow will help your AI-edited photos stay sharp, clean and useful without turning every image into an unnecessarily large file.






